By Patrick Mott
Snug as a bug in a tent
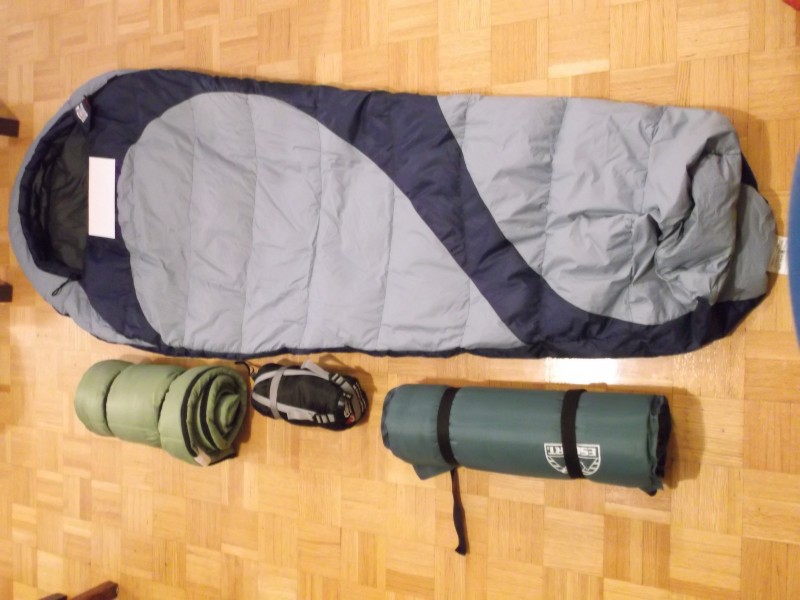
When preparing for a winter trek, the most important piece of gear is an appropriate sleeping bag. The “right” sleeping bag is an incredibly individual decision, although important factors are the temperature rating (remember to check the overnight temperature!), the style (mummy-style sleeping bags are more efficient at keeping you warm), and the fill (down or synthetic). Although my personal preference is down (light, easily packed, and heat-efficient), even a “cheap” -15°C down bag can cost upwards of $600, while a similarly rated synthetic bag costs about $150 (although these bags are typically about 3–4× heavier). When picking a bag, be safe, not sorry: shivering through the night can ruin a trek.
Tip: A thick inflatable sleeping pad is also important, as it provides a layer of insulation between you and the snow you’ll be sleeping on (thicker, within reason, is better).
Something to lug your gear
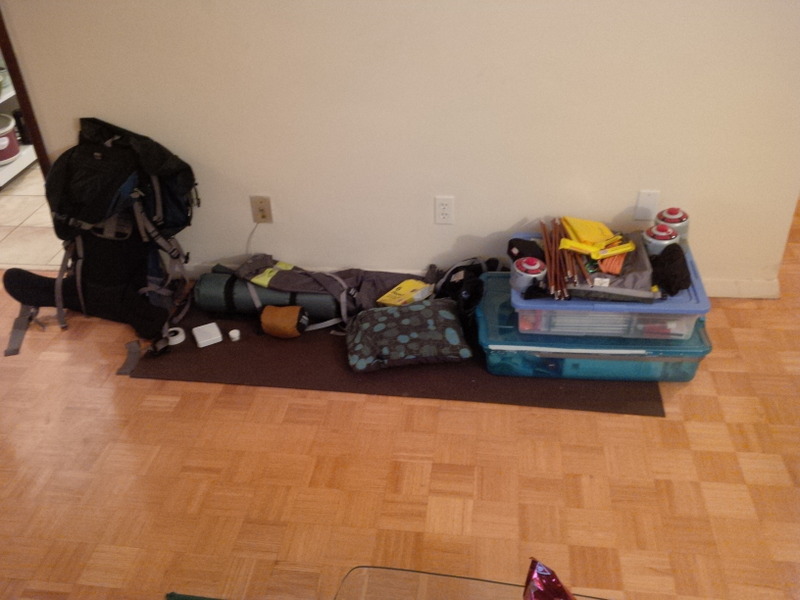
The next question is “pack or pulk?” If you’re wonder whether that’s a typo, a pulk is a sled that is pulled behind you. Home-made pulks are fairly simple (you can make them from any toboggan), can be easily covered with a tarp, and can carry a fairly large amount of weight without much effort. However, my preference is a pack, as it is easier to maneuver on slopes and across rivers, and you can typically fit everything you need for a winter trek in a large (60-80L) pack. If you find that space is an issue, compression sacks are a cheap way to pack down your clothes and sleeping bag (I typically bring a large compression sack for clothes and a small one for my sleeping bag).
Tip: Packs with easily accessible pockets on the side or waist band can make accessing your water, food, compass, or camera much easier.
Cooking up some grub
Once you have a sleeping kit and a pack/pulk, cooking is the next major decision. Although a campfire is always an option, you will have to find a lot of wood, and maintaining a fire in 2 feet of snow can be challenging. I suggest either a biostove ($50–100 or can be home-made) or a liquid fuel stove (≥$100). Compressed fuels can be coaxed into working in cold weather, but this takes time and warmth (two things that are at a premium in winter) and reduces their performance. Biostoves burn wood, bark, cones, or other natural fuels within a cylinder to provide heat, while liquid fuel stoves provide the most versatile and dependable performance without the need to scrounge for fuel. For cooking tools, I typically only take a stainless steel pot (with a lid to cut-down the boil time), but a light-weight frying pan can also be useful if you’re looking to cook meat.
Tip: For almost all camp meals I can get by with a stainless steel mug, spoon, and pocket knife. However, there are many durable plastic bowl and plate options, and my friend swears by his “spork”.
Keeping hydrated
For collecting and storing water, I prefer a hydration bladder for the other 3 seasons, although water quickly freezes in the mouthpiece during winter. Your best bet is a wide-mouth Nalgene bottle that can handle boiling water without deforming. Speaking of water, you’ll want to make sure you make camp near running water if at all possible. Although you can boil water from snow, this takes time and fuel, and can be really frustrating when you’re trying to whip up your meals.
Tip: Leave your Nalgene submerged overnight in a nearby stream with a string attached to a tree. In the morning, you can collect the water (it won’t freeze) for cooking without getting your fingers wet.
Layers upon layers
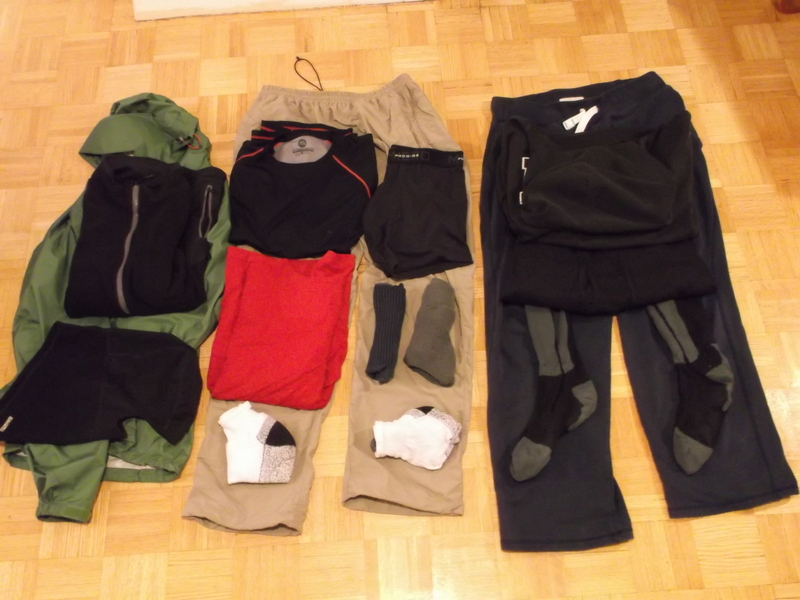
Dressing for a trek in the backwoods is a bit different than dressing for a winter stroll in the park. Although you will definitely want the hat and mitts, you might consider leaving the oversized parka at home. Instead, consider a water/windproof shell, one or two insulated mid layers, and several breathable base layers. Although wool is the tried-and-true option, I prefer synthetics for their increased breathability. Remember that sweat is not your friend in the cold, so opt for slightly less clothes than you would expect while trekking (I typically hit the trail in a single long-sleeve layer); let your activity keep you warm, and throw on an extra layer when you stop.
For tasks around the campsite, a thin pair of gloves will let you perform precise tasks, while also protecting your fingers. Lots of socks are also key, and the occasional foot warmer (or hand warmer) will go a long way in the early morning or late evening. Don’t forget a dedicated set of clothes for sleeping in: the clothes you wore (and sweated in) on the trail will make you awfully cold in your sleeping bag.
Tip: Depending on how active you are (i.e., how much you sweat), your boot laces may freeze overnight. Consider unlacing the top half of your boots at night so that you can easily slip into them in the morning.
Quick picks
I swear by my Buck Alpha knife as my go-to camping knife/saw. However, in the winter you’re going to want significantly more firewood than you use in the summer, so a hatchet can be invaluable. A good headlamp (I suggest >80 lumens) can allow you to hike after dark and makes evening tasks a lot easier. When on the trail, Gatorade drops the freezing temperature of water, and can eliminate the need to stop and warm up your water during breaks. A camera is an awesome way to document your trek, but your keep those batteries close, as they “die” when stored at cold temperatures (consider keeping a set in your pocket). A pack cover or small tarp is also useful as an impromptu seat or spot to collect small pieces of gear that might otherwise disappear in the snow.
Tip: Although a map and compass should be mandatory for all backwoods trips, they are especially important in the winter, as snow has a nasty habit of covering up trail markers.
General packing list:
Clothes: Quick-dry hiking pants, socks, compression shorts, long johns, synthetic base layer, insulated mid-layer, outer shell, light gloves, heavy mittens, toque, sleeping clothes (sweat pants, sweater, long socks, hat, long sleeve top).
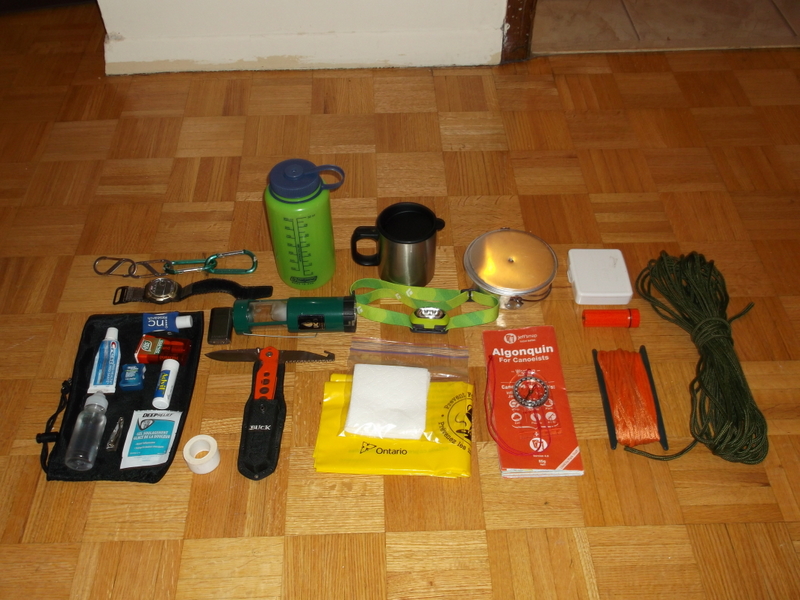
Gear: Map, compass, knife, hatchet, watch, matches, lighter, head lamp and batteries, sleeping bag, sleeping pad, rope, compression sacks, camp pillow, tarp, stove, fuel, Nalgene, pot and lid, mug, spoon, large piece of tinfoil, toilet paper, first aid kit, toothbrush/paste, camera, batteries, shoes.
Food: Focus on “add water” meals (oatmeal, rice, noodles, freeze-dried entrees) and easy-to-eat snacks (granola, bars, jerky). Don’t forget the coffee/tea and Gatorade.


Leave a Reply